Master Solar-Powered Dummy Camera Installation & Security Coverage
Solar-powered dummy cameras offer a green, cost-effective security solution for homeowners. They uti…….
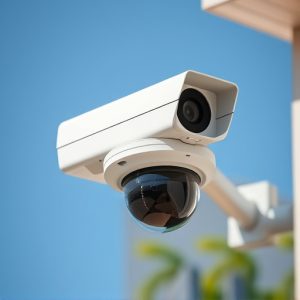
Solar-powered dummy cameras offer a green, cost-effective security solution for homeowners. They utilize renewable energy, provide uninterrupted surveillance, are easy to install and maintain, and feature realistic designs to deter intruders. Top brands like Arlo and Ring offer high-definition video quality, motion detection, and weatherproof design. Installation involves strategically placing the camera with unobstructed sunlight access near entry points, while regular maintenance ensures optimal performance over time.
“Elevate your home security with the power of solar-powered dummy cameras. These innovative devices offer a reliable, eco-friendly solution for surveillance without the need for complex wiring. In this comprehensive guide, we’ll explore the benefits and key features of these cameras, present top model picks to suit various needs, and provide an easy step-by-step installation process.
Learn optimal placement strategies to ensure comprehensive security coverage and discover maintenance tips to maximize your solar dummy camera’s lifespan.”
- Understanding Solar-Powered Dummy Cameras: Benefits and Features
- Top Picks for the Best Solar Dummy Camera Models
- Step-by-Step Guide to Installing a Solar-Powered Dummy Camera
- Placement Strategies for Optimal Security Coverage
- Maintenance Tips for prolonging your Solar Dummy Camera's Lifespan
Understanding Solar-Powered Dummy Cameras: Benefits and Features
Solar-powered dummy cameras offer a unique and sustainable approach to home security, appealing to environmentally conscious homeowners. These cameras are designed to run on renewable energy from the sun, eliminating the need for constant electricity supply. This feature is particularly advantageous for outdoor installations, as it ensures uninterrupted surveillance without worrying about power outages or hidden installation costs.
Beyond energy efficiency, solar-powered dummy cameras come with various benefits, such as easy setup and maintenance. Their sleek design often mimics real security cameras, serving as a powerful deterrent to potential intruders. Many models also include motion detection capabilities, allowing them to capture and alert you to any suspicious activity. This technology makes them an excellent investment for enhancing your home’s perimeter security without breaking the bank.
Top Picks for the Best Solar Dummy Camera Models
When it comes to enhancing your home security with a solar-powered dummy camera, there are several top picks that stand out for their reliability and effectiveness. These models combine the benefits of renewable energy with advanced surveillance capabilities, making them ideal for outdoor use. Key features to look for include high-definition video quality, motion detection, and easy installation, all of which contribute to a comprehensive security solution.
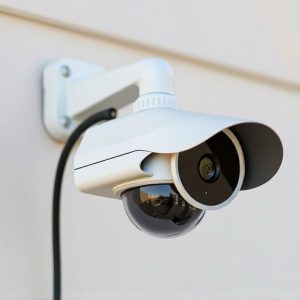
Popular brands like Arlo and Ring offer solar dummy cameras that seamlessly integrate into your existing home security system or work independently. The Arlo Essential Solar Camera, for instance, boasts a 180-degree field of view and 2K resolution, while the Ring Solar Security Camera provides HD video and advanced motion zones. These cameras are designed to withstand various weather conditions and can be strategically placed to monitor your property day or night, thanks to their solar power source and built-in rechargeable batteries.
Step-by-Step Guide to Installing a Solar-Powered Dummy Camera
Installing a solar-powered dummy camera is an easy process that can significantly enhance your home’s security. Here’s a step-by-step guide to ensure a smooth setup:
1. Choose a Location: Select a spot outdoors where you want to place the camera, ensuring it has unobstructed access to sunlight. A visible location near entry points or areas with high foot traffic is ideal for deterring potential intruders.
2. Unbox and Inspect: Remove all packaging from your solar-powered dummy camera kit. Check that all components are present, including the camera body, solar panel, mounting hardware, and any additional accessories.
3. Mount the Solar Panel: Find a location nearby (ideally within several feet) where you can attach the solar panel to receive maximum sunlight exposure. Use the provided screws or adhesive to securely mount it on a wall, pole, or dedicated bracket. Ensure it’s angled towards the sun for optimal charging efficiency.
4. Connect and Position Camera: Attach the camera body to the mounting hardware, ensuring it’s level with your desired viewing angle. Connect the solar panel’s output cable to the camera’s power input, and extend any other cables as needed for a clear line of sight. Aim the camera lens towards the area you wish to monitor.
5. Configure Settings: Access the camera’s settings menu using its mobile app or provided software. Adjust motion detection sensitivity, recording quality, and notification preferences according to your security needs. Set schedules or timers if desired for energy-efficient operation.
6. Test and Optimize: Power on the solar-powered dummy camera and test its functionality. Check live feeds, ensure motion detection triggers alerts, and verify that recordings are saved correctly. Adjust positioning or settings as needed for optimal performance.
Placement Strategies for Optimal Security Coverage
When setting up a solar-powered dummy camera for home security, strategic placement is key to achieving optimal coverage. Positioning your camera near entry points like doors and windows offers the best chance at deterring potential intruders. Moreover, consider installing multiple cameras around your property’s perimeter to create a comprehensive surveillance network. This way, you can capture various angles and ensure no blind spots exist.
For maximum effectiveness, aim for a clear line of sight without obstructions such as trees or shrubs. Additionally, take advantage of natural features like fences or walls to enhance the camera’s field of view. By thoughtfully implementing these placement strategies, you’ll greatly improve your home security using solar-powered dummy cameras.
Maintenance Tips for prolonging your Solar Dummy Camera's Lifespan
To prolong the lifespan of your solar-powered dummy camera, regular maintenance is key. Start by cleaning the lens and sensor area with a soft, dry cloth to remove any dust or debris that could hinder its performance. This simple step ensures clear images and videos. Additionally, inspect the solar panel for any damage or obstruction that might affect charging efficiency. Keep the panel clean and free from shadows or obstructions like leaves or branches. Regularly check the battery’s health, especially in low-light conditions or during prolonged periods without direct sunlight. Many modern models have built-in batteries that can be replaced, ensuring your camera stays operational even on cloudy days.
When it comes to installation, proper placement is crucial for optimal performance and longevity. Mount the solar dummy camera in an area with unobstructed access to sunlight for most of the day. Avoid shaded spots or areas where debris could accumulate, which might block the sun’s rays. Ensure the camera has a clear view of the area you want to monitor, allowing it to capture high-quality footage effectively. Regularly test the camera’s functionality, including motion detection and recording, to ensure it remains reliable over time.
When it comes to enhancing home security, solar-powered dummy cameras offer a convenient and cost-effective solution. By investing in one of the top-rated models mentioned in this guide and following simple installation steps, you can easily monitor your property. With proper placement and regular maintenance, these cameras provide 24/7 surveillance, deterring potential intruders and giving you peace of mind. Incorporating solar technology ensures a sustainable and eco-friendly approach to home security.