Solar-powered dummy cameras offer an eco-friendly security solution that requires no electrical outlets. To install, prepare your exterior space by clearing debris and positioning the camera for optimal sunlight exposure (south in NH, north in SH). Securely mount the solar panel and base unit, aligning the panel with your latitude for maximum sun access. Choose a strategic location for clear visibility and maintain security with stable mounting hardware. Conduct final checks to ensure proper connections, panel orientation, image capture, and sensor/alarm functionality. Troubleshoot common issues related to sunlight, positioning, battery drainage, or connectivity by optimizing exposure, checking cables, and updating firmware as needed.
“Uncover the secrets to installing a Solar-Powered Dummy CCTV system on your exterior space. This comprehensive guide breaks down the process step by step, from understanding the benefits of solar-powered cameras to final checks for optimal performance. By preparing your area and following mounting instructions, you can enhance security without breaking the bank. Discover how to position the fake camera effectively and troubleshoot common issues for a successful installation.”
- Understanding Solar-Powered Dummy Camera Systems
- Preparing Your Exterior Space for Installation
- Mounting the Solar Panel and Base Unit
- Positioning the Fake CCTV Camera
- Final Checks and Troubleshooting Tips
Understanding Solar-Powered Dummy Camera Systems
Solar-powered dummy camera systems offer a unique and environmentally friendly approach to home security. Unlike traditional CCTV setups that rely on electrical outlets, these solar cameras are designed to be self-sufficient, drawing power from sunlight. This feature makes them ideal for remote or outdoor locations where running wires may be impractical. The installation process is straightforward; the camera is typically mounted on a pole or wall, and its solar panel faces towards the sun to capture optimal energy during the day.
Understanding how these systems work is essential for successful Solar Powered Dummy Camera Installation. Each unit consists of two main components: the camera itself and the solar panel. The camera captures footage and stores it internally or transmits it wirelessly to a monitoring system. The solar panel absorbs sunlight, converts it into electricity, and powers the camera’s operations. Proper placement is crucial; ensure the panel receives direct sunlight for at least 6-8 hours daily to ensure optimal performance and battery charging.
Preparing Your Exterior Space for Installation
Before installing your solar-powered dummy camera, it’s crucial to prepare your exterior space to ensure a secure and effective setup. Begin by clearing the area where the camera will be placed, removing any debris, plants, or obstacles that might hinder its placement or view. This step is essential for optimal camera functionality and clear visual coverage.
Check the accessibility of sunlight as solar-powered cameras rely on this natural resource to charge their batteries. Ensure the installation location receives ample sunlight exposure throughout the day, ideally facing south (in the Northern Hemisphere) or north (in the Southern Hemisphere) to maximize sun exposure. This preparation will facilitate a seamless Solar Powered Dummy Camera Installation and ensure your security system operates efficiently.
Mounting the Solar Panel and Base Unit
To commence the Solar Powered Dummy Camera Installation, the first step involves mounting the solar panel and base unit. Position the solar panel in a location that receives ample sunlight throughout the day. This could be on a wall, roof, or any stable surface outside. Ensure the panel is angled correctly to capture maximum sun exposure – typically at an angle matching your latitude for optimal energy generation.
Secure the solar panel firmly using appropriate mounting hardware. Next, attach the base unit of the dummy camera to the chosen location, aligning it with the solar panel. This ensures both components are level and stable. Connect the two via a suitable cable, following manufacturer guidelines, to complete this crucial step in your exterior CCTV installation process.
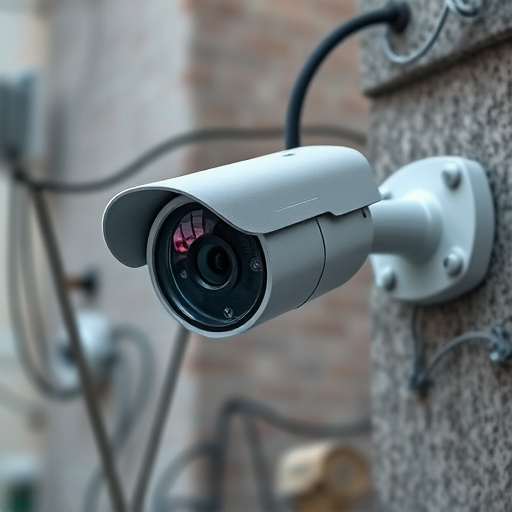
Positioning the Fake CCTV Camera
When positioning your solar-powered dummy camera, the first step is to choose a strategic location that provides clear visibility of the area you want to monitor. This could be on a fence, wall, or pole, ensuring it’s high enough to deter potential intruders but not so high that it becomes difficult to access for maintenance or adjustments. Consider factors like lighting—the camera needs adequate sunlight for its solar panel to charge effectively—and line of sight, which should be unobstructed to capture clear footage.
Once you’ve selected the ideal spot, secure the camera firmly using the provided mounting hardware. Make sure it’s stable and won’t be easily knocked over or tampered with. Proper positioning is key to ensuring the effectiveness of your security system while also maintaining an aesthetically pleasing look, whether in a residential or commercial setting.
Final Checks and Troubleshooting Tips
After completing the physical installation, it’s crucial to perform final checks on your solar-powered dummy camera setup to ensure optimal performance. Verify that all connections are secure and that the panel is facing the sun for efficient charging. Check if the camera captures clear images and footage, ensuring the resolution meets your expectations. Test the functionality of any motion sensors or alarms associated with the system.
If you encounter issues during or after installation, troubleshooting tips can expedite the process. Common problems may include insufficient sunlight, panel orientation, battery drainage, or connectivity glitches. Check power sources, ensure optimal sun exposure, verify cable connections, and update firmware if available. Consult the manufacturer’s guidelines for specific troubleshooting steps related to your Solar Powered Dummy Camera model.
Installing a solar-powered dummy CCTV system is an effective way to enhance your home or business security without the cost and hassle of running electrical wires. By following these mounting instructions, you can easily prepare your exterior space, install the solar panel and base unit, position the fake camera, and conduct final checks. With these simple steps, you’ll have a reliable, eco-friendly surveillance solution that blends seamlessly into your environment.